

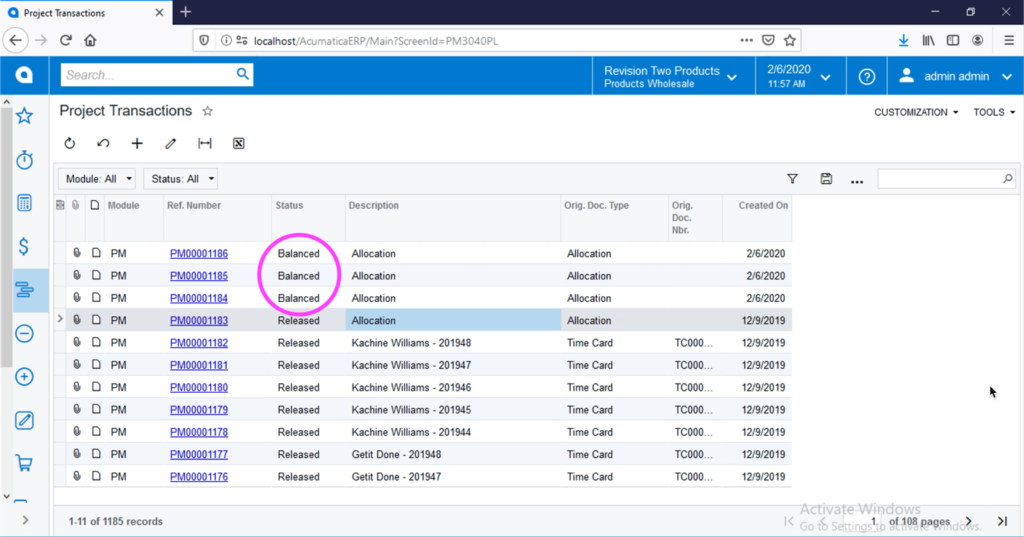
In this example, we’ll be using the Project Transactions screen to demonstrate how to enable a mass delete of records in Acumatica.
Scenario: You have setup allocations in the project module and do not have auto-release allocation batches turned on. Therefore, project transaction allocation batches are created with a status of ‘Balanced’.
Problem: The system created allocation batches that did not produce desired results and you would like to delete them.
Steps:
- Go to the Project Transactions entry list.
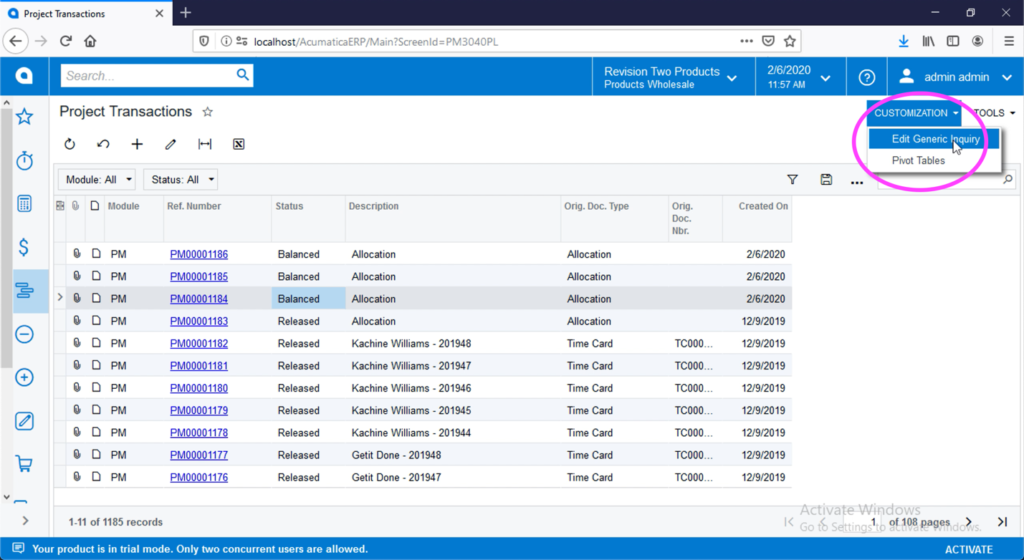
2. Go to Customization > Edit Generic Inquiry.
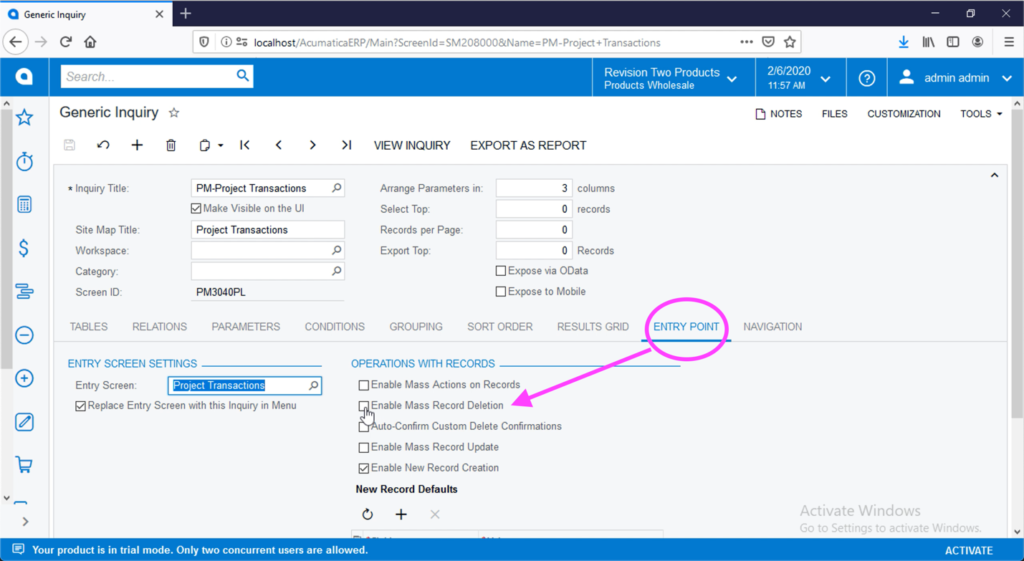
3. Go to the Entry Point tab and select ‘Enable Mass Record Deletion’.
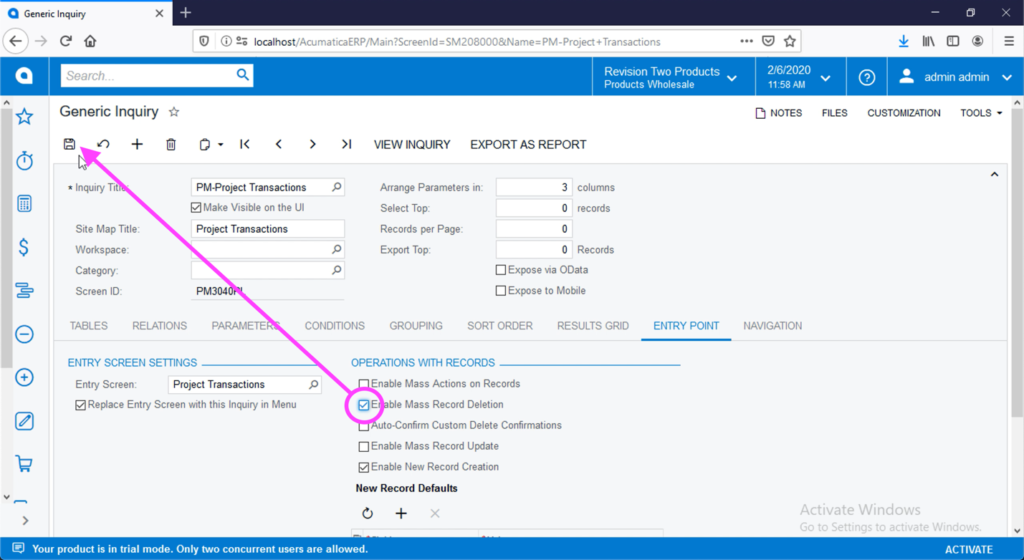
4. Save your change.
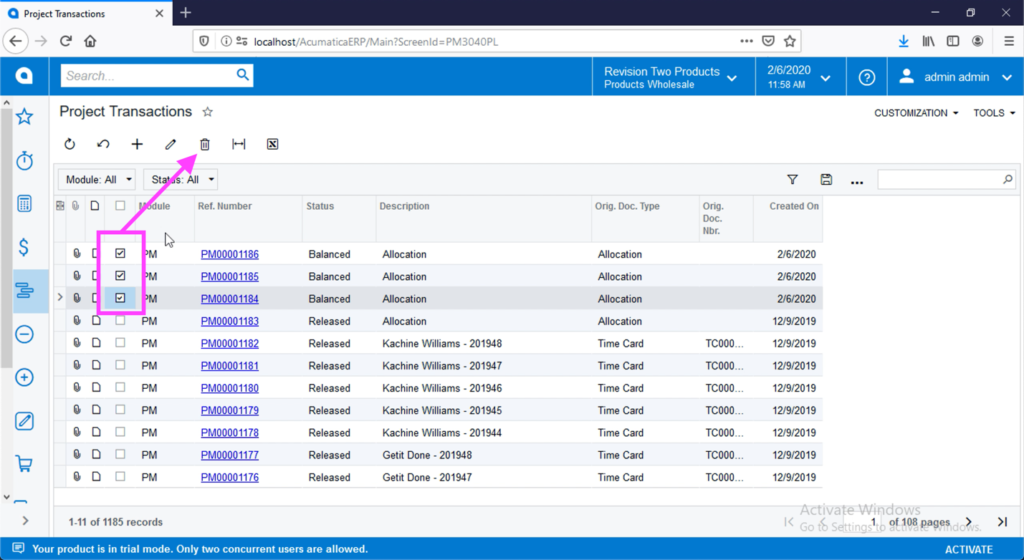
5. Go back to the Project Transactions entry list. Note the new unlabeled checkbox column. Select the records to delete and click the trash can icon.
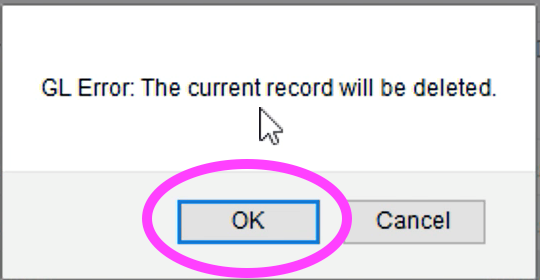
6. Click OK.
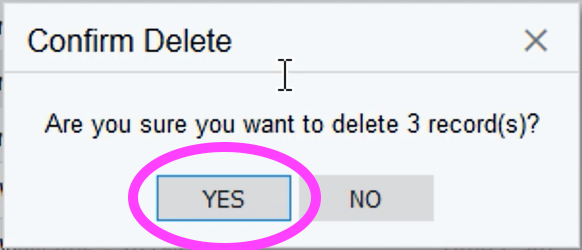
7. Click Yes.
Note 1:
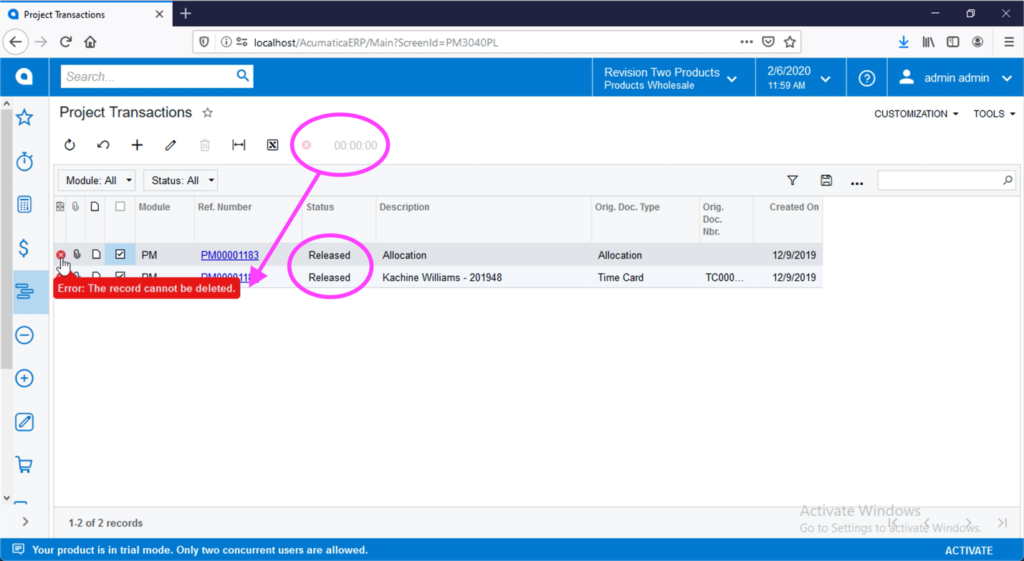
The system will mark each batch with a green checkmark to confirm deletion.

Note 2:
Only balanced and on hold batches can be deleted. The system will produce an error if you try to delete a released batch.
Note 3:
To enable a custom generic inquiry, the inquiry must be an entry list.
See the process here:
If you have questions about this process or any other Acumatica process, contact us here.